UZZ32 Active Valve Body Reseal
- Written by Peter Scott at
Planet Soarer October
2003
|
|
I resealed my UZZ32 Active Valve body hoping to eliminate a high speed
right hand corner bounce - no luck. BUT the reseal did do two things:
-
No more sag when the car is parked
.
-
Car smoothly adjusts height when at stop lights - no more sudden
suspension movements.
So these two things alone made it worthwhile for me.
Stay tuned for front
shock rebuild and further sensor swaps.
Disconnecting boot sensor removes bounce
and makes car softer - but an error message is displayed on dash.
|
|
Here's some bounce theories
that I was faced with:
A. The valve body (front passenger fender) needs a reseal. Seals leak, letting
pressure out of shock, shock pumps itself up again, leaks out, pumps up etc etc.
There is a seal kit listed for $70 in parts CD - I have this kit and will
attempt open heart surgery on Active this weekend. Kit consists of 20 or so
o-rings - funny sizes etc - Toyota Japan agreed to manufacture this kit for me -
took about 8 weeks. (NO THIS DIDN'T FIX IT)
B. Bottom part of shock - the sealed pressure part is stuffed. Don't know how it
works - but new ones are available for 400 or 700 bucks - forget which. A seal
kit for $120 for top half and a new bottom half gives a new shock that isn't that
expensive. BUT what does the bottom sealed part of the shock do? and how do you
know if it's stuffed and what would it affect?
C. Nitrogen accumulator is stuffed. No idea what this is or what it means. I can
guess, but I don't KNOW.
My car has a bounce only through right hand bends with very high g-force. It is
not speed related - only g-force sets it off. Only notice it on racetrack or
driving with Rob Hayden (same thing really!). Left hand bends it is perfect. A
real pain at Mallala and Phillip Island - my exhaust has bounced off!
My bounce is affected by the grip of surfaces and tyres. Race tyres on dry track give
maximum violent bounce. Kumho's 265's street tyres on damp road exhibit no bounce.
Others have also reported certain tyres affect on bounce. Pirelli PZero comp 235/45/17
inch tyres didn't bounce like my 225/50/16 540s semi slick tyres.
Bleeding the individual struts didn't affect my bounce. Only Rob Hayden and racetrack guys will ever feel my
bounce - it doesn't exist during normal or spirited street driving - only
"racing".
So grip levels and g-force affect my bounce the most. The car has always had
this. Nothing I have done has affected the bounce. At Mallala I had to change
driving style, slow in and spin tyres out to stop bounce - I couldn't corner at
maximum g's for fear of bounce.
At Phillip Island, the corner onto the main straight is a lefty - perfect - but right
hander at 200 kph at end of straight is uncomfortable and Honda corner is
violent. The rest of track is ok. MG right is ok, but I expect this is due to
the slow speed of the corner.
So there you go.
If anyone knows or has any theories I'd like to hear them.
Like what does the sealed bottom part of the Active shock do?
Pictures of exploded shock are here:
http://planetsoarer.com/UZZ32/uzz32struts.htm
Could it be some g-force sensor stuffing up?
Why only right hand bends?
Why do some Actives have slow speed, speed hump bounces (not mine)?
What lets pressure out of shock?
Is it some feedback loop?
Could it be electrical (sensor?) or hydraulic seal?
Rebuilding top half of shock didn't fix it.
Bleeding it didn't fix it. |
| Given
the problems that I was having and that I was able to procure a
rebuild kit for the valve body from Toyota, I thought I'd give
it a go anyway. I referred to Jeff Harper's 'Soarer Bible' to
assist me with the task. The text said to tighten
the Allen screws at the top of each strut to lock the suspension -
this is
to stop it collapsing when you removed the lines from the valve body.
There were also several warnings about only working on the valve body in
a clean room.
No fibre gloves.
NO rags.
Bare hands or clean rubber gloves with no powder.
No compressed air.
Natural air dry only. |
I had to bag up and wire tie all
of the lines as they were undone. I made a special
service tool out of some bookcase mounts.
Need to make another one to remove the
filter somehow.
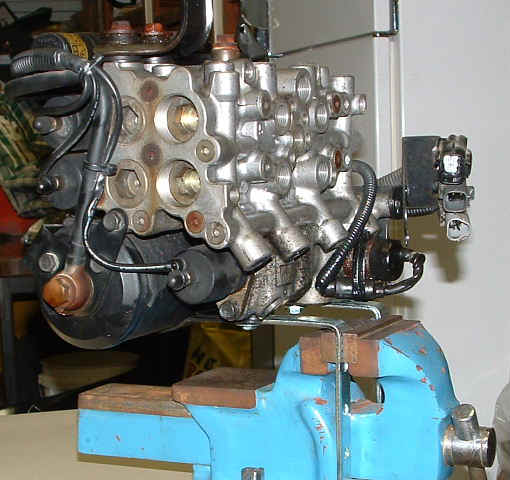 |
The valve body is spotless inside. BUT the old
'o' rings that I am replacing are squared
off - you can see it with the naked eye - they are worn for sure.
So there's hope that the Toyota Valve Body Overhaul Kit will do the trick.
The filter is stainless steel mesh - washable - never need to buy another -
explains it's $350 price tag a bit.
The filter did have some crud in it - looked
like little bits of metal - clean shiny aluminium- not much - the rest was
spotless.
I didn't use the seal for the pressure sensor off the side of the filter -looks
like it just sends warnings if
pressure gets too low. - or the four little
o-rings for the other mystery bits.
It just didn't seem important on inspection. |
| I rang James at Castle Hill
Toyota and asked for the overhaul kit for the UZZ32
valve body and he did the rest. It's an official Toyota Kit. I also ordered
sufficient active fluid to flush the system and recharge the
valve body. Changing the seals was easy, bumper removal was easy, removing the valve body
was ok. The holding bracket was easy.
Keeping everything clean is a pain.
Figuring out what to do, wondering what everything is for, that's the tough bit
- it's coming together though.
It doesn't seem so hard at all now that it's nearly done. I was dreading it.
Same as the shock rebuild.
I just hope it starts, bleeds, runs and works now.
It's open heart surgery on an Active.
Special tools were replaced with bookshelf brackets to hold body on vice.
The
filter removal tool was just two screwdrivers and a spanner - it's not that tight
and o-ring seals it.
So although it wasn't a hard job - there looks to be plenty that can go wrong,
some high risk stuff.
And it's not even going yet and who knows if the problem will be
fixed. |
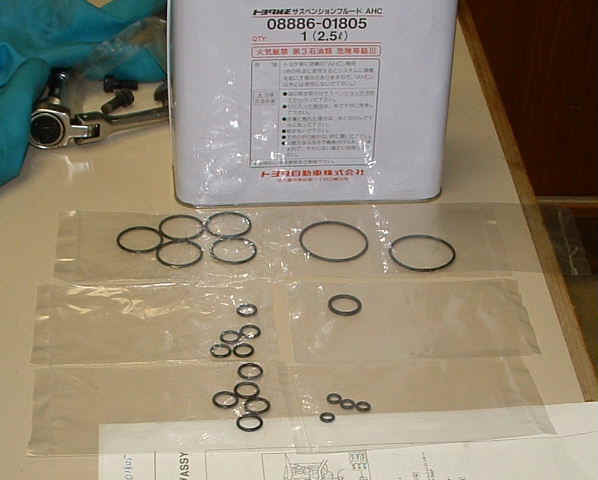 |
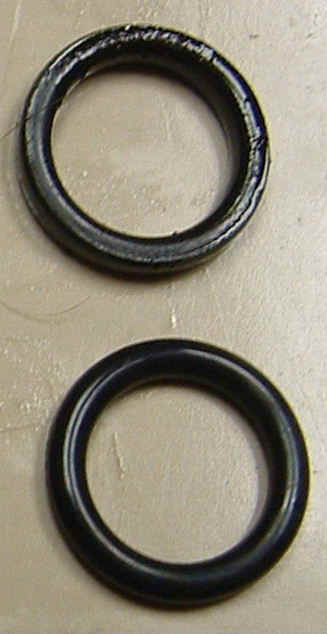
Picture of the old and new o-rings - top one has squared off.
|
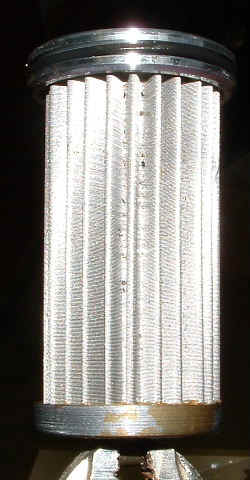
Stainless steel filter before cleaning.
|
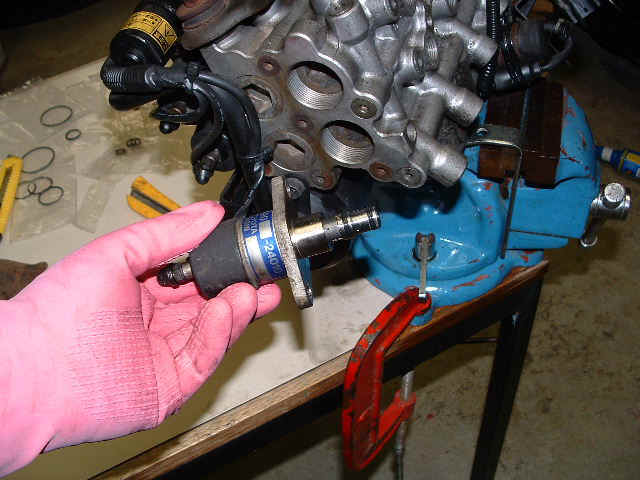
One of the 5 valves removed from the
body. |
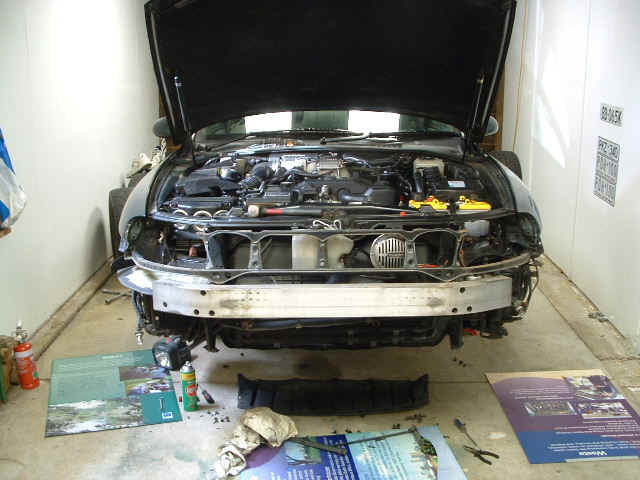
The job starts by setting the car on
stands.
The bumper has to come off for sure
to give simple access to the valve body which is under the
passenger side headlight, forward of the front wheel. |
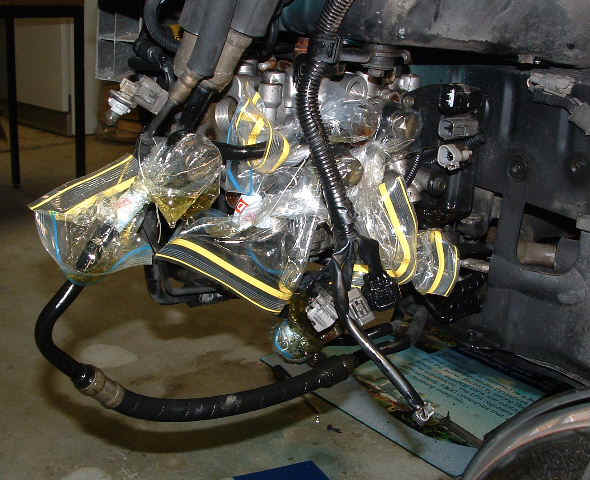
Plastic bags and wire ties for every line.
|
In taking the bumper off and removing the valve body I would have been lost
without the workshop manual in English and Japanese.
You will need a copy for
sure - the workshop manual is the best thing to have for your Soarer.
Even if
you don't work on the car yourself you can print out the pages and hand them to
your mechanic.
I wouldn't attempt this without the manual.
http://planetsoarer.com/jeffharper/productguide.html
The impression I got from Toyota Japan was that no-one had ever asked for a
seal kit before ever.
They agreed to manufacture one for me - estimated 10 days
stretched to nearly 2 months. But I don't know for sure what the situation is.
Sometimes I get the impression that because of depreciation in Japan and high
cost of repairs, the 32 didn't get fixed much.
Then once exported no-one knows
how or what to do so they still don't get fixed much.
Hence I lot of 32's
limping around wounded - which is a real shame.
It would be great to talk to a Japanese Toyota Mechanic who has that official
"Toyota UZZ32 Service Technician" certificate on the wall and ask what does
cause bounce, what are common problems and fixes etc - but what are the chances
of that?
Do Toyota Japan still service and repair UZZ32's?
I don't know.
So the result after all this work - No change. The car drives the same as before I reckon.
The high speed right
hand corner bounce is exactly the same. Normal ride I didn't really pay
attention.
So on my car, resealing the valve body made no difference to high speed bounce
around right hand corners. Left hand corners are still a dream.
Part number for seal kit is
04490-24011
List price $85, Net $59.09, GST 6.53, freight 6.20 total of $71.80.
Call James at
Castle Hill Toyota 02 9680 2233
|